The cinematic appeal makes sense for story-telling videos like weddings, travel documentaries, and everything that has an emotional aspect and movie aspect to it.
The cinematic effect means you experience a scene smoother and more natural. Either because that is how our eyes and brain perceive the real world or maybe just because we are used to big screen movies for such a long time and we think that is how it should look.
Movies standard was and still is a frame rate of 24 fps. That’s the number of frames the industry agreed on for movies and that is a long time ago.
If you watch a 24p then all movements are really smooth — a frame containing movement can be slightly unsharp like you would take a still photo with a slow shutter speed and a the subject moves.
By watching those footage our brain doesn’t categorize the smooth picture as blurred but instead associates a more natural scene.
To achieve that in your video filming you need to adjust your shutter speed: lower it to 1/50 when filming in 24p and to 1/60 when filming in 30p.
The rule behind that is the 180 degree shutter rule: 1 / (2*frame rate). Historically the 180 degree shutter refers to a rotary disc shutter found in motion picture cams. But important is that with a relatively ‘slow’ shutter speed of 1/50 or 1/60 you get quickly some blur effects when motion comes into play. It works like with still images: the slower your shutter speed the more blur you have in the image when movement is captured. Mostly not wanted except when you go for Long Exposure pictures.
If you are using faster shutter speeds movements get more detailed and will not appear as smooth.
Shooting the footage: the frame rate
Ideally shoot your video in 24p and post-process it on a 24p timeline. However, if you shoot in 30p because you want to capture more detail and you might want to use the footage later maybe as 30p OR 24p then you can drop 30p to 24p.
I am mostly working in Adobe Premiere and Adobe After Effects. I am importing the 30p footage and ‘interpret’ the clip to 24p, then drag it on a 24p timeline.
How to ‘interpret’ the footage in Adobe Premiere Pro CC: Select the 30p clip in your project, then select from the menu ‘Clip->Modify->Interpret Footage…’. In the following dialog go to ‘Assume this Frame Rate:’ and set it to 24p. Do not just drop the 30p footage on the 24p timeline because it will result in a jittery video.
Mavic Pro Camera Settings for Video
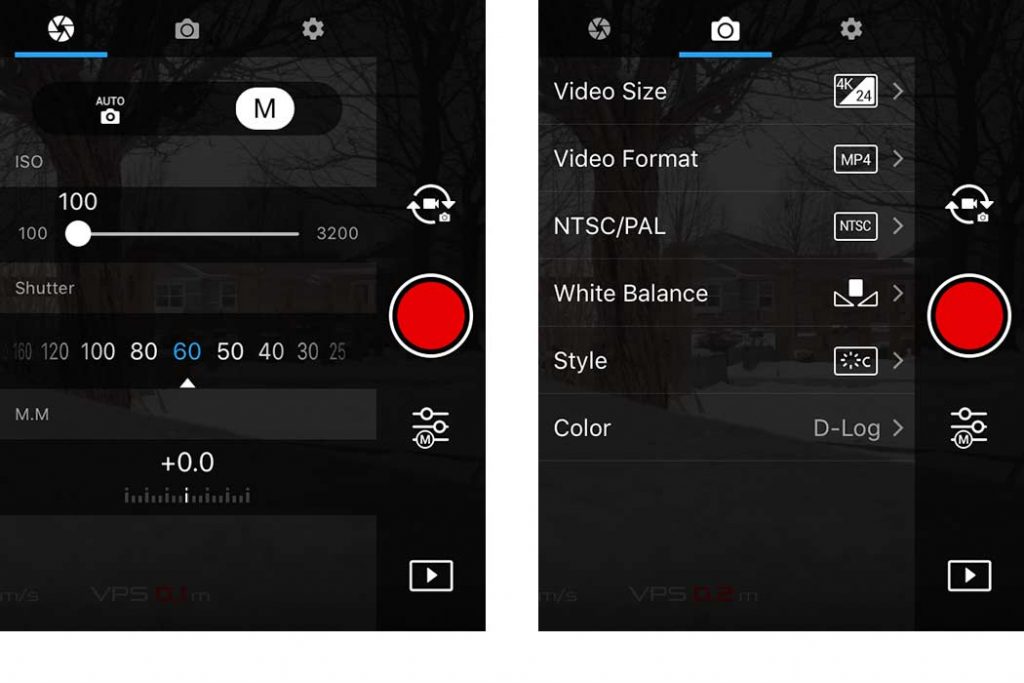
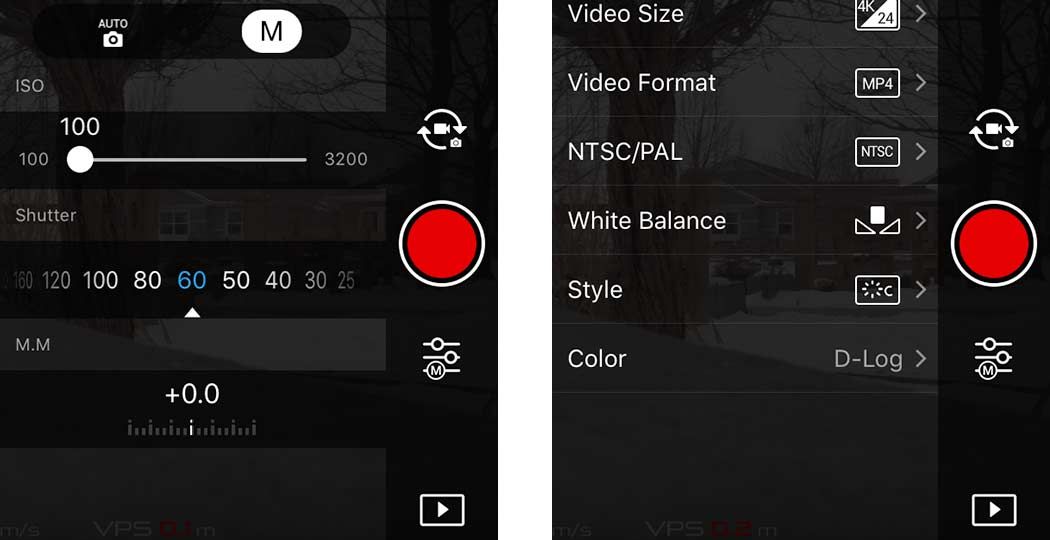
You need to go from AUTO to MANUAL mode in your camera. With the Mavic Pro camera you have just ISO and SHUTTER to play with. APERTURE can’t be changed for the camera.
I am trying to stay at ISO 100 in order to reduce the video noise. In low-light situations you might need to go higher.
SHUTTER, as mentioned should be 1/50 or 1/60 depending on whether you film in 24p or 30p.
The above example / illustration shows a Shutter Speed 1/60 with Video Size 4k and the frame rate 24fps — it should technically be 1/50 for 24 fps but I believe it would anyway be difficult to see the difference between 1/60 and 1/50 later.
In the following description I do not mention the NTSC/PAL setting because it has no influence on your cinematic footage. It depends on the country where you live. In the United States you select NTSC. Western Europe and Australia, I think use PAL. I don’t know if DJI Mavics come with different settings in PAL countries. My Mavic Pro version is a U.S. version.
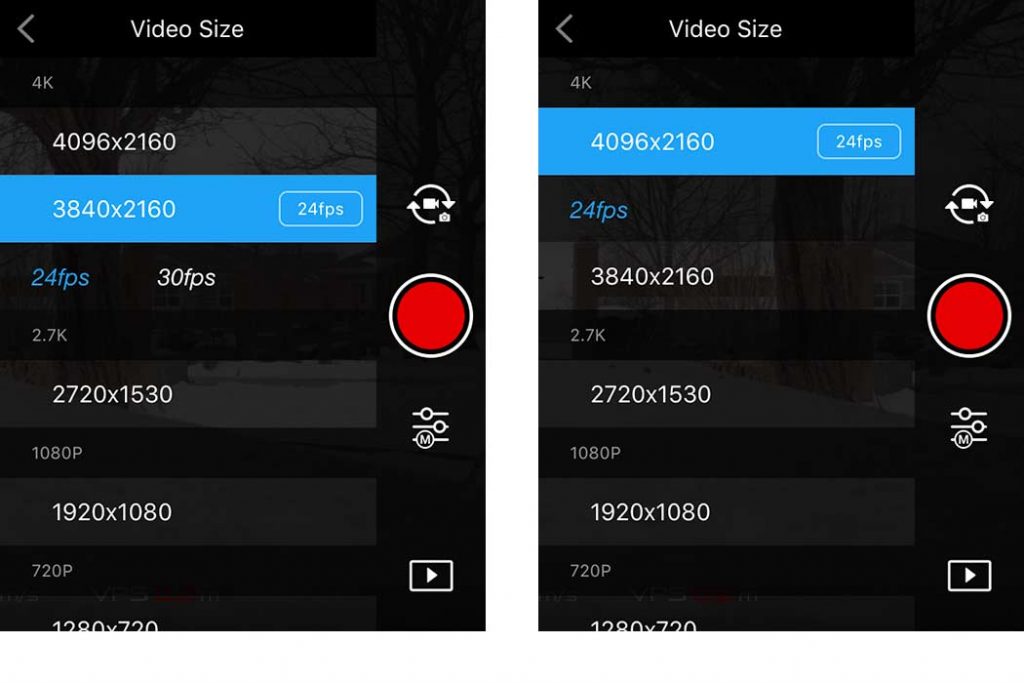
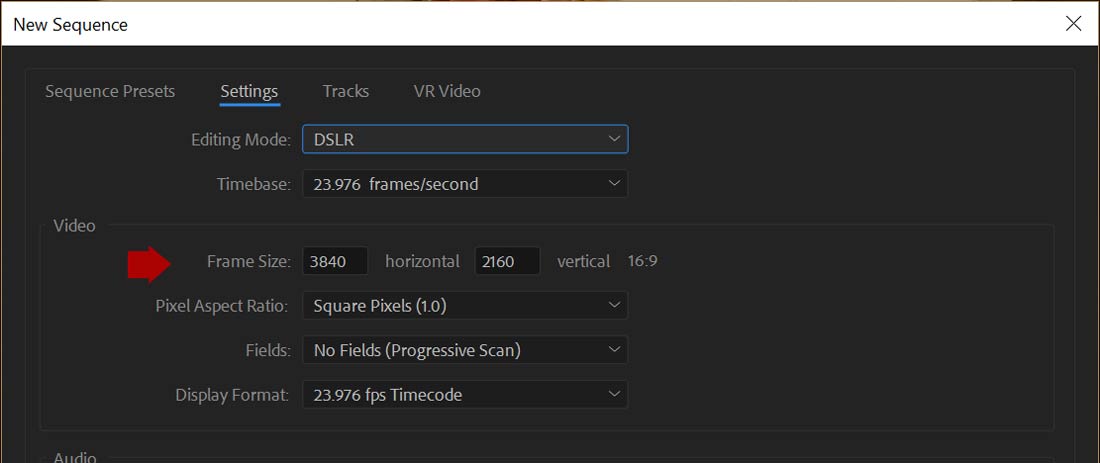
For Video Size I use 4k in either flavor: 4096 cinematic width or 3840 standard width.
Frame Rate either 24fps or 30fps for 3840 standard 4k and for the cinematic 4k you have anyway only 24p.

Video Format: As a PC user I am preferring MP4 and I heard quite often that Apple user prefer MOV. I am not sure if either format has advantages over the other.
White Balance: I am mostly using AUTO … because I am not sure if I would guess the Kelvin temperature more precisely when I do it manually. But custom is the way to go once you have the experience with different filming scenarios or when you want to be consistent among shots.
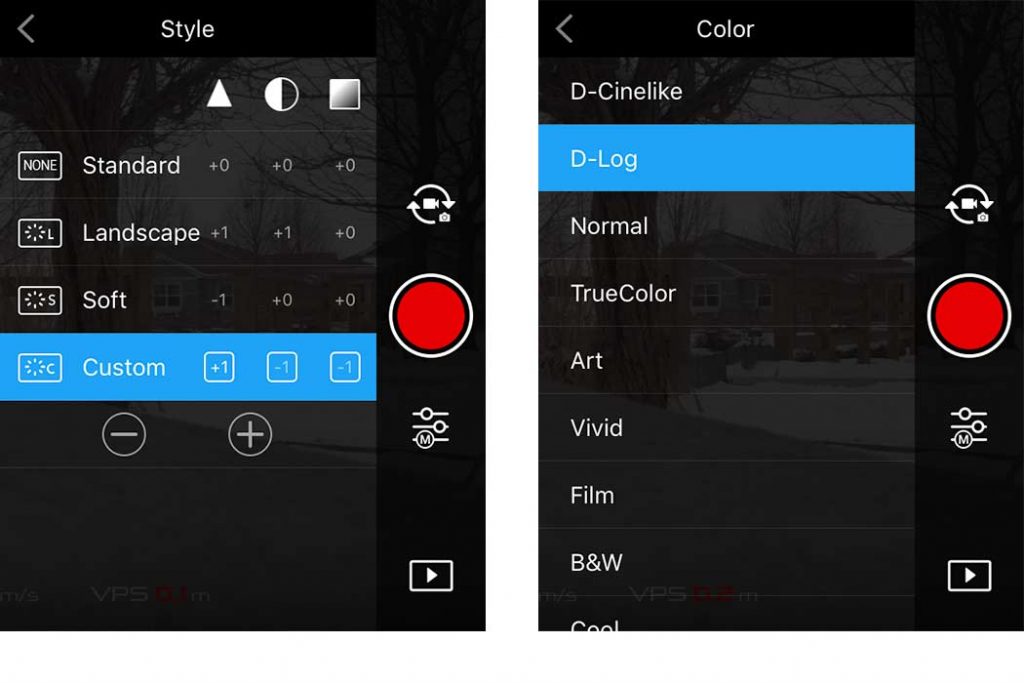
Style: Custom
Sharpness +1 / Contrast -1 / Saturation -1
Sharpness is +1 for the reason that it is said that the ‘+1’ value prevents the Auto De-noise. That is quite possible or at least the value of De-noise is less. I haven’t done those tests but I definitely do want as much overall pixel sharpness as possible vs. washed out regions in the frame.
Contrast and Saturation should be less than normal because I am adding those back later in POST-PROCESSING.
Color: D-Log offers the highest Dynamic Range for the recorded image frame. D-Log, however, requires lots of post-processing and some experience in Color Correction. D-Log is in my opinion the best option because it handles strong contrasts in a scene (like highlight areas and shadow areas) better than other Color options. E.g. if you film a sunset or sunrise where these contrasts are present. Other Color options tend to emphasize either the highlights or the shadow areas.
D-Cinelike is another good option: it will require only minimal post-processing and as long as you do not have strong contrast areas in your scene it works great.
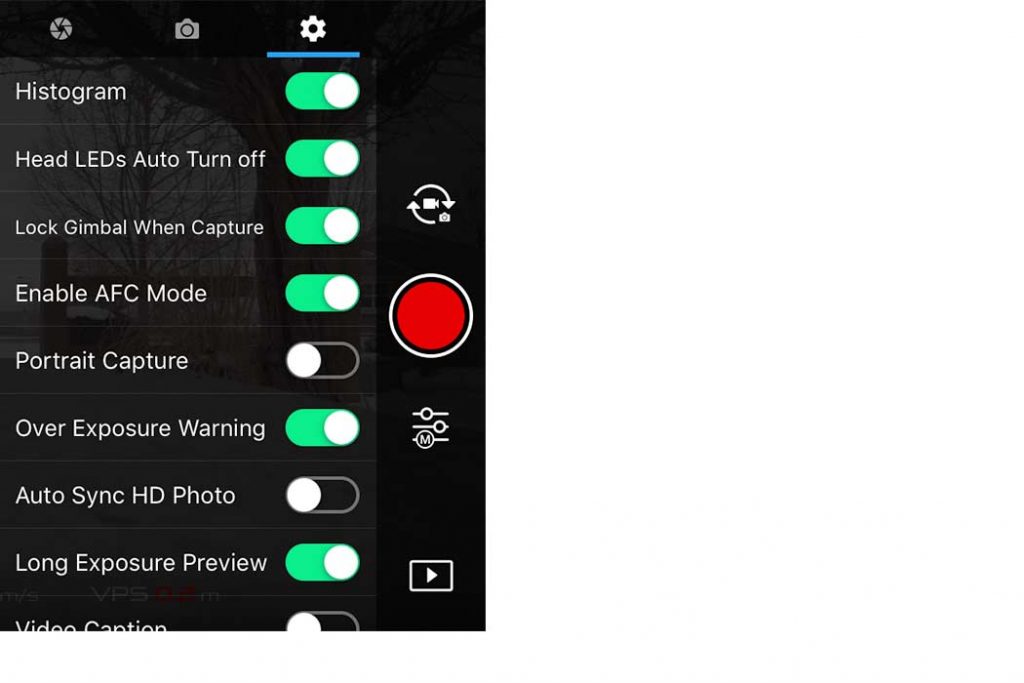
2 settings are noteworthy:
Histogram: I turn it on to have it displayed in the live view window. It indicates nicely if your recorded image will have spikes in Highlights or Shadows (the very right and left of the histogram). D-Log is a very flat profile (gamut curve) and should overall show a low profile histogram and more in the middle section of the chart.
E.g. while you are setting the COLOR settings you can switch between D-Cinelike and D-Log and you can see the difference in the Histogram.
The 2nd setting, see above illustration, is OVER EXPOSURE WARNING. It basically turns on the Zebra function and overexposed areas in your live view are marked.
Please note that you should not have any ZEBRAs in your live view, with the exception of direct Sunlight. Zebras mean that you have blown out the highlights and they are NOT recoverable later in post-processing.
With D-Log you should expose in a way that you are as close as possible to getting ZEBRAS (overexposed areas) but stay right below it. D-Log should look bright in your live view. Never dark, because you have no chance in post-processing to get a underexposed frame back to correct exposure without getting in serious video noise which will make the footage unusable.
ND filters
In daylight situations the Mavic Pro would run into over-exposure because you are setting ISO 100 and a low SHUTTER SPEED of 1/50 or 1/60. That manual setting cannot be corrected with an APERTURE setting because the Mavic Pro has no other aperture. The only way to correct the over-exposure is to put an ND filter on the lens. ND filters are basically sunglasses for your Mavic Pro.
The filters come in different strengths: ND 4, ND 8, ND 16 are the most common. The higher the value the darker the sunglasses. There are also ND 32 which might be the right strength for daylight and lots of reflecting snow. Otherwise ND16 works great for sunny days, ND8 is good for cloudy/partly sunny days, and ND4 works for darker days.
I am using these ND filters for Mavic Pro with Polarizer to reduce reflection (Amazon link): http://amzn.to/2DRiW0D
Check out Amazon:
LUTs
LUTs are color grading Lookup Tables: they basically are presets and determine how the recorded information in a frame will be interpreted: how much brightness, saturation, contrast, etc. LUTs are dependent on the input gamma curve (like D-Log, S-Log2, etc.) and the final output device (like TV or monitor or projector).
LUTs give you a head start when you post-process your footage and show an immediate result. Often you might like that out-of-the-box. LUTs exists in many variations and each of those give your footage a specific Look & Feel.
You can buy LUTs from several vendors OR you could create your own LUTs. Either with specific software like 3D LUT creator or also with Adobe Photoshop CC which lets you export LUTs. That’s stuff for another article, I guess.
Resources & Reference of mentioned and/or used software for this article
Adobe Creative Suite / Premiere Pro CC: Trial versions of Creative Cloud Apps
Note
Announced January 2018 and available February 2018 is the new Mavic Air which has almost the same camera specs as the Mavic Pro but is half the weight. This article should be valid for the Mavic Air as well. For the ND filters there might be a version for the Mavic Air available.